Mexican Corn Salad

This was a dish we tried for the first time last week.  The first time around we did it as a main dish, but found it to be much more suitable as a side item.  Tonight, we used it as a side dish to go with some beautifully grilled ribeye steaks and some spicy ranch style beans with sliced jalapenos… the flavors really complemented one another.

Okay, first, the ingredients:

Ingredients:

  • 4 large fresh cobs of corn
  • 2 tbsp light mayonnaise
  • 2 tbsp fat-free Chobani Greek yogurt
  • 1/2 tsp chili powder (more or less to taste)
  • 1 tbsp fresh lime juice (from half a lime)
  • 1 tbsp minced cilantro
  • 2 tbsp scallions, minced
  • 1/2 cup (40 g) cotija cheese, grated
  • 5 lime wedges for serving (optional)

Pretty easy prep work.  The first step is to grate the cotija cheese.  Cotija is a Mexican cheese which is made from cow’s milk and is a hard cheese.  If you can’t find cotija in your area, then feta cheese would be a suitable replacement.  You can go ahead and mince up your scallions and cilantro and have them ready to go as well as they will enter the recipe at the same time as the cheese.

Grated cotija cheese, minced scallions, and cilantro.

The next step is to boil your corn.  Corn cooks very quickly, cooking too long can dry it out.  My recommendation is to get your water boiling and put your corn in… let it boil for 5 minutes and remove it from the water.  It will be hot so use tongs and let it sit aside and cool for a bit until you can pick it up.

Comes out the same way it goes in… weird!

While the corn is cooling, go ahead and get your sauce together.  Mix the Chobani Greek yogurt, light mayo, lime juice, and chili powder!  I’ve tried several Greek yogurts, and believe me that Chobani is by far the best of the bunch… so smooth, creamy, and delicious… it is increasingly becoming an ingredient in several dishes.

A simple yet delicious sauce!

Now you’ll want to cut the corn off the cobs… this is a simple process if you’ve never done it before.  Simply hold the corn up and slice straight down the corn at the base of the kernels.  In 4 easy swipes you should be able to easily take off 1/4th of each corn cob from end to end.  Once you have the corn removed… add it to the sauce you just made and give it a good stir to coat the corn.

Corn and its coat of many colors.

The final step will be to add the scallions, cilantro, and cheese… give it another stir and serve warm.  A creamy, delicious, and overall wonderful warm corn salad!

Ready to plate!

Please comment if you like what you see, share away on Facebook, Pinterest, Twitter, etc. and as always… happy cooking and enjoy eating!

Bubbly Enchilada Casserole

This is an old Weight Watchers recipe which has been altered and posted on tons of recipe sites… here’s how we did it tonight:

Ingredients:
Heb – Tomato Sauce (8 oz)
Goya – Black Beans Low Sodium, 1 container (1 4/5 cups)
Old El Paso – Mild Green Chile Enchilada Sauce – 1 Can
Jennie-O – Extra Lean Ground Turkey Breast, 1.25 pounds
Kraft Natural Shredded Cheese – Mexican Four Cheese 2% Milk, 1 cup
Pillsbury Grands Biscuits – Homestyle Buttermilk – Small Container (5 biscuits)

First thing first, the prep work… this is honestly one of the easiest recipes you’re ever going to find.  Your prep work consists of rinsing and draining your black beans and then cutting your biscuits into quarters:

What’s better than 5 biscuits? 20 biscuits!

Turn your oven to 350 degrees.  Get a 9X13 baking dish and spray it lightly.  Set it aside.  In a large skillet, brown your turkey.  Once it is browned then you’re going to add the tomato sauce, enchilada sauce, and black beans (again, make sure they’re drained and rinsed!).

Building flavor!

Flavor built!

Once you’ve got everything added, give it a good stir to combine.  Now you’re going to add your biscuit quarters and mix everything together before placing in the casserole dish and spreading evenly.

Spread ’em!

Put the mixture into the oven for 25 minutes.  Pull it out and evenly spread 1 cup of the Mexican style cheese over the top.  Place it back in the oven for 10 minutes.  Take it out again and (In-N-Out, In-N-Out… that’s what a casseroles all about…) let it set for 5 minutes to firm up.  Makes 6 servings at just under 400 calories each.

A thing of beauty!

Delicious as is, I added a bit of Tapatio to the top of mine as I love Tapatio on all hispanic inspired foods!

Plated… SO good!

Hope everyone enjoys this entry… let us know what you think by commenting below and be sure to come back and let us know if you’ve tried this!

Until next time… happy cooking and enjoy eating!

Easy Chili Verde

Hello everyone, time for another weekly recipe update from Send Me the Recipe!  As always, any comments, follows, likes, twitter followers, etc. are greatly appreciated!  This week we’re going to focus on another budget friendly and healthy recipe… an easy take on a classic Mexican dish, chili verde or green chili!

The goods.

  • 1 pound lean ground beef
  • 1 large red bell pepper, chopped
  • 1 large onion, chopped
  • 6 cloves of garlic, chopped
  • Chili powder
  • Ground cumin
  • Cayenne pepper
  • 16-oz jar of green enchilada sauce (I use La Costena and think it’s great!)
  • 1/4 cup of water
  • 15 ounce can of pinto or kidney beans, rinsed
The first thing we’re going to do is the chop, chop, chop!  Sometimes when you’re cooking, you may feel like a ninja (think mercenary skilled in the art of ninjitsu, not really bad ass blender) but it’s well worth it!

Peppers, onions, and garlic; oh my!

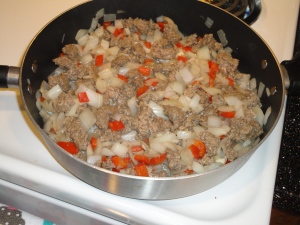
Prep work done… easy enough; time to cook!  Get a large skillet onto medium heat on the stove.  Add in your pound of lean ground beef along with your onion and pepper you just sliced and diced with your handy katana sword and/or kitchen knife.  Do not add the garlic just.

We are family; my onions and my peppers and me!

The wooden spoon you see off to the side there is very important.  There is not a handier nor dandier device created for the crumbling of cooking meats.  Whether it’s spaghetti, chili, or whatever in which you want crumbled meat… the wooden spoon is the way to go!  More experienced kitchen ninjas may use nunchucks, but most of us will opt for the more traditional kitchen utensils.

The desired result.

After about 8-10 minutes your onion and pepper should have softened a bit and your meat should be browned.  Now it’s time to add the garlic along with chili powder (about a tablespoon), the cumin (a couple of teaspoons), and the cayenne.  Cayenne pepper is where you’re going to get most of the heat in this dish beyond the green enchilada sauce.  The rule with cayenne (unlike a dollar these days) is that a little goes a long way… give everything a stir for about 15 seconds and then add in a full jar of the green sauce and the water.

Simmering the night away!

Bring this all to a simmer, reduce to medium-low, cover and cook.  You’ll want to give a good stir every few minutes for about 10-15 minutes until the vegetables are fork tender.  The final step is to stir the beans in and cook until they are heated through which should be no more than a couple of minutes.

You’re left with 4 servings of a low fat high fiber and high protein dish (sodium is also a bit high… being fair) which comes in at about 561 calories per serving.

The finished product!

Once again, thank you for taking the time to read through this.  I hope you enjoy the recipe; be sure to comment below and let us know your thoughts and definitely come back and comment if you decide to give this recipe a try!

Until next time… happy cooking and enjoy eating!

Slow Cooker Chicken Taco Soup

Hello there!  It has been awhile since our last update… the link cable for the digital camera to be able to download from the camera to the computer had gone missing so we needed to order a new one.  We got it, so it’s time for a late-night update.  It’s 1:45 in the morning on July 4th, what better time than the wee hours of America’s Independence Day to post a recipe for a taco inspired soup?

This is another recipe that is extremely easy, cost effective, and at just under 500 calories per serving it’s a healthy recipe which is easy on the diet as well.  This is a solid balance of carbs, proteins, fiber.   Here’s what you’re going to need:

  • An onion
  • A can of chili beans
  • A can of whole kernel corn
  • 8 oz. can of tomato sauce
  • 1 beer of your choosing (feel free to drink the other 5)
  • 20 oz. of Rotel or diced tomatoes and green chiles
  • 1 package of taco seasoning (recommend regular over mild)
  • 12 oz. of boneless skinless chicken breast

Nice and easy!

You’re going to give your onion a rough chop.  Once you’ve done that, open everything (only the corn needs to be drained) and add it into a slow cooker/crock pot.  Don’t forget the secret ingredient… it’s that subtle flavor at the end of the dish that really puts this over the top and differentiates it from other soups of its type.

Shhhh! Don’t tell, it’s our little secret!

Give everything a good stir.  The next step is to take your uncooked chicken breasts and lay them on top of the concoction.  Once they’re there, give them a good poke until they’re just underneath the surface.

Chickens can float…

…and they can swim underwater; or beer.

Now here comes the “hassle” of cooking (aren’t crock pots great?)… set it on low, put the cover on, walk away for 5 hours.  Watch a movie or two, mow the lawn, take a nap, drink the 5 beers left from earlier, etc.  It’s up to you!  After 5 hours, come back and take the chicken breasts out of the soup.  You’re going to want to set them aside and let them cool down for 10-15 minutes so they will firm up a bit.

Once the chicken breasts are firm (insert inappropriate firm breast comment here), you’re going to want to shred them with a fork.

Fork tender chicken!

Now add the chicken back into the crock pot and give everything a stir.  Cover it back up and let it sit for 2 more hours and you should end up with something like the following…

The finished product!

This soup is great as is and at about 490 calories for 1 of the 6 servings you’re getting good bang for your buck!  If you choose, you can garnish with sour cream, shredded cheese, and/or crushed tortilla chips.  I enjoy this soup as is and occasionally will add a little Tapatio sauce to give it an extra bit of kick.

Please comment below and let us know what you think of this recipe, and be sure to come back and tell us if you tried it… what did you think and what did you do differently if anything?

Until next time… Happy 4th to those readers in the States, happy cooking, and enjoy eating!

Cassoulet Chicken Thighs and Sausage

Typically, the first thing people want to know when I tell them about Cassoulet Chicken & Sausage, is what in the world is Cassoulet?

In simple terms, it’s a French style of cooking which typically contains meat (many different varieties) and white beans.  Cassoulet is common enough in France to be sold in grocery stores in cans.  The higher-end dishes may include lamb, duck, goose, etc.  But, we’re balling on a budget here so this is in the cassoulet with ingredients available to the every day shopper (and not terribly unhealthy either).  Assuming you have the spices and keep cooking wine on hand (also not expensive), you can make this recipe for under $15.

First off… the ingredients:

  • 2 cans of white beans (great northern or cannellini work great)
  • Extra virgin olive oil (or “EVOO” as Rachael Ray calls it)
  • 1 pound of boneless skinless chicken thighs (trim the fat!)
  • 1 large onion
  • 6 cloves garlic
  • Rosemary
  • Thyme
  • Black Pepper
  • White wine
  • Reduced-sodium fat free chicken broth
  • Water
  • 1 package Bilinski’s Organic Chicken Italian Herb Sausages with Porcini Mushrooms, sliced 1 inch thick

For a time saving tip… use 2 cutting boards, one for your raw chicken and one for your ready to eat sausage and veggies (avoid cross contamination!).  Trim the fat from the chicken, cut into 1/3 size pieces and then cut each 1/3 size piece in half.  In a large skillet, heat up about a tablespoon of “EVOO” on medium high heat and then add the chicken in a single layer (if it’s piled up it will not cook evenly) with the heat turned down to medium.

Who are you calling chicken?!?

While the chicken is cooking, this is a great chance to prep the other items.  Cut the sausage into about half-inch pieces, and give the garlic and onion a rough chop.  You don’t want to dice or mince the garlic and onion as the bigger chunks will equal bigger flavors and texture in the final dish.

Somewhere in here (usually 3 or 4 minutes in) you would want to turn the pieces of chicken over to brown the other side and cook it another 3 or 4 minutes.  Once the chicken is nicely browned, remove it from the skillet. Do not rinse the skillet… you want the oil and pan drippings for the nextstep.

Pollo!

Now you will want to add the onion and garlic to the skillet and cook for about 5 minutes.  Stir every minute or two.  You want the onion and garlic to soften but not deeply browned.  While the onions and garlic are cooking, take a handful of the white beans and mash them up with a fork.

Onions and garlic, one of life’s great couples!

What beans look like on the inside.

After the onions and garlic have softened, you will now want to add the rosemary, pepper, and thyme.  Seasonings, as always, are to taste… go for somewhere between 1/2 teaspoon and one teaspoon each, but keep the measurements about equal so no one flavor profile is dominating the dish.  Keep stirring and you’re about 30 seconds away from aroma central (this is about the time neighbors will start peeking their heads around your windows to find out what you’re cooking in there).  After about half a minute, add 1/2 cup of white wine.

Onions, garlic, rosemary, thyme, and black pepper.

 Disclaimer:  Normally I do not recommend (in fact, I insist against) stove top cooking on high… your stove has a “high” option which is pretty much meant to boil water, but the point here is to reduce the white wine by about half… so on high it goes!

Once the wine has reduced by half, it’s time to bring the entire flavor party onto the dance floor (i.e. put everything in the skillet).  Add in 1/2 cup of chicken broth, 1/2 cup of water, the sausage, beans (mashed from earlier along with the remaining whole beans) and the chicken.  Give everything a good stir and let it come to a boil.  Once it comes to a boil, put a lid on it, reduce to medium heat, and let simmer for about 5 minutes until the chicken is done.

You should end up with a delicious, fragrant, filling, and economic (see: budget friendly) recipe the whole family should love.  Our 4-year old loves this so much he actually eats as much of it (if not more) than the adults.

The finished product!

Please leave a comment and let us know what you think of this recipe, and of course definitely let us know if you try it for yourself!

Until next time… happy cooking… and enjoy eating!